Preparing Your RV’s Interior for Safe Winter Storage.

Preparing Your RV's Interior for Safe Winter Storage.

Preparing your RV Interior for Winter

Table of Contents

Introduction

There is a lot to think about when preparing your RV, 5th wheel, or travel trailer for winter storage. Whether you choose to store your recreational vehicle at home or at an RV storage facility there are several important steps to take to not only ensure your camper is holding its value, but to also ensure it is ready for the next camping season.  

At Storageville USA  we understand the value of properly preparing your abode on the road for the cold months ahead, and even more importantly setting yourself up for a successful first seasonal outing. Which is why we have put together this series of articles. In the last post, we covered Winterizing Your RV With Antifreeze, and dumping your waste tank, these two steps are probably the most important in protecting your RV’s plumbing while it sits over winter. However, the plumbing system is not the only thing that needs attention before you park your RV for the winter months.

In the next few paragraphs, we will cover some essential tips to help protect the interior of your RV against winter weather and other issues that can arise due to prolonged sitting. 


Interior Appliances

After you have dialed in your plumbing system there are a few more plumbing-related items in your RV or 5th wheel that may need some winter protection. 

Not all RVs are equipped with these luxuries, but if you are lucky enough to have any of the following: Fridge/Freezer, Dishwasher, or a washing machine you will definitely want to protect them from possible damage due to winter weather, or non-use.

The best way to winterize your appliances is to follow their individual instruction manuals, however those are not always easy to find, so we have created a general how to for each below.


Fridge/Freezer Combo

  1. Turn off your fridge, and remove everything inside.
  2. Let it defrost (this can take a full 24 hours).
  3. If any water accumulates, use a wet/dry vac or towel(s) to thoroughly dry.
  4. Clean the fridge thoroughly. NOTE: Do not use abrasive scouring pads or cleaners as they can damage the interior of the appliance.
  5. Leave the doors open to allow the appliance to fully dry. This will help reduce the production of mold and mildew.

Does your Refrigerator have an ice maker?

  1. Close the water supply valve to the ice maker.
  2. Place the icemaker arm in the OFF position.
  3. Remove the garden hose adapter from the water solenoid valve.
  4. Then, you can remove the icemaker line from the water solenoid valve. DO NOT UNWRAP the wires from the solenoid valve.
  5. Drain all the water from the water supply line and the icemaker water line.
  6. Place the end of each line into a clean plastic bag, or clingwrap and tape closed.  

To use the ice maker again, just reverse the steps. 

Dishwasher

I learn something new every day. Apparently, it is common to winterize an RV dishwasher and (clothes) washing machine while you are winterizing the plumbing system of your RV. 

Give me 2 seconds to edit the last blog post… 

It is as simple as Starting a wash cycle, when you can no longer hear water being fed in you stop the machine. Then turn it back on, since a dishwasher always starts a cycle by pumping out any fluid, it will pump and drain antifreeze out. DO NOT FORGET to wipe any leftover antifreeze residue from inside of your dishwasher to avoid unwanted staining.

If you are just finding this out, like myself – you may already be past the point of winterizing your dishwasher the easy way. However, if you have not run it in a month or so, you should be okay, especially if you are storing your RV in a mild winter climate. The only tips I have for you to follow at this point are:

  1. Clear the dishwasher trap of any old food remnants.
  2. Clean the top, bottom, walls, and interior door of the dishwasher with food-safe and non-abrasive cleaners.
  3. Dry the appliance the best you can, and leave to door ajar to promote further drying and as a precautionary way to prevent mildew and mold.

Washing Machine

Much like the dishwasher, it is not a huge deal if you were unable to winterize the washing machine at the same time as the rest of the plumbing system. If you have not run a wash cycle in a month or so you should be in the clear. 

My original intent for adding appliances to this post was to prevent musty smells that accompany long-term storage, aid in pest and mold prevention, and provide a list to follow when closing your RV down for the winter months. Regardless of the new information from here on I will just leave those suggestions and tips in list format, like these ones for your RV washing machine:

  1.  If you have a front-load washer, you will want to make sure you clean and dry the gasket that seals the appliance. Front load washers are notorious for door gasket mold. A simple 3-1 white vinegar-to-water mixture should not only eliminate the musty smell in the drum of your washing machine, but it should also take care of active mold and mildew. If you have had this issue for a while it is likely that the mold will leave a stain that cannot be removed without damaging the seal. Replacing the gasket isn’t too hard as long as you can find a replacement gasket. 
  2. Using the same 3-1 or even 2-1 white vinegar to water ratio you can wipe out the drum of either a top load or front load washing machine. 
  3. Leave the door propped open on either type of washing machine to prevent that old towel smell.  

Interior

If you are anything like me you like to clean your house before you leave for vacation that way when you return home, all you have to do is unpack, do some laundry, and allow yourself to slowly come back to reality. Your camper is your home away from home, your vacation on wheels. The last thing anyone would want to deal with is last season’s mess and the possibility of unwanted squatters aka pests. This room-by-room list should help you stay on track while prepping your RV for storage and help keep you prepared for your first seasonal outing.

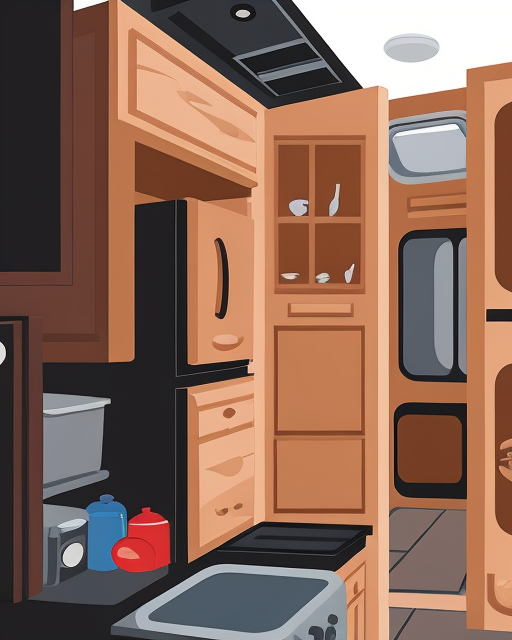
Kitchen & Dining Area

The goal of cleaning the kitchen area is to remove any trace that food was ever stored inside your RV. This will help prevent rodents and other pests drawn by the scent of food.

  • Cabinets/Food Pantry – Completely empty the pantry cabinets. – Yes, even the spices, non-perishables, and cooking oils. Then wipe the cabinets clean. 
  • All Dishes– Make sure all dishes are clean and free of food debris. Also, vacuum out any food debris, and if particularly bad wipe the inside clean. If you have a set of cast iron pots and pans you love to travel with, I would recommend storing them in a plastic tote.
  • Stove Top/Oven – Most RV ovens have a removable bottom that makes it much easier to clean. 
  • Under the Kitchen Sink – Remove any liquid cleaning products as they can freeze. If you have a water filter or built-in soap dispenser it would be a good idea to remove these as well.  If your RV will be stored where freezing temps are not a concern you can skip this step. 
  • Small Kitchen Appliances- i.e. toaster, coffee maker, microwave, and the like –  be sure they are clear of food as well.
  • Counters & Table- wipe them down. 
  • Table Seating – Vacuum between the cracks of the bench seating, and clean up any old spills you find. 

Bathroom

  • Remove tubes of toothpaste, shampoos, and conditioners. These items can attract rodents and have the potential to freeze and burst.
  • Remove any medications, ointments, creams, and contact lenses from the medicine cabinet. Most medications recommend storage in a dry environment with temperatures between 58 -86 degrees Fahrenheit. RVs tend to produce humidity during their winter storage, especially if they are covered. Liquid medications and liquid gels are known for drying out or melting which can lead to consuming the incorrect dosages.

Lounge Area

  • Cushions- if possible, remove the couch cushions and vacuum the crevices. TIP: Use an unsharpened pencil to free larger items from nooks and crannies prior to vacuuming to prevent clogging, and maybe find that lost earring.
  • Cupholders – Does your lounge area have cupholders? If so, I would highly recommend wiping them clean.

Bedding/Linens/Towel

I do not know who is not doing this, but you should wash all of your bedding, towels, and linens prior to storing them for the winter. If you are doing this great! We can be friends! If not, I highly recommend it. 

If storage space is tight at home, or if you like to keep RV things stored inside of your RV. I’d recommend storing all cloth items inside of a vacuum-sealed bag. After the bag is sealed place a few bounce dry sheets on top of the bag. Adding the dryer sheets to the vacuum-sealed bag of cloth items is not recommended as dryer sheets and fabric softeners are known to stain cloth material.

Don’t have vacuum-seal bags? No problem. Another method I have found to be successful is the trash bag method. Place your clean items inside a trash bag or two, force the air out the best you can, and tie shut. If I use this method I like to store the trash bags inside of a plastic tote to lessen the chance that I  encounter any surprise insects. I still add dryer sheets to the tote and layer them between each bag to detour rodents.

The cloth items stored this way are typically ready for use in Spring without needing another washing. However, that clean sheet feeling won’t be there, so you may want to wash it all again just before next season’s maiden voyage. 

Mattresses

My only tip is this statement: Mattress protectors are amazing. 

Closets

Check all of the closets for items you may have stored and forgotten about. If it is liquid remove it. Clothing, robes, jackets, sweatshirts you only use when camping? Follow the bedding and linen advice above.

If it holds value monetarily or sentimentally take it home with you to store. 

Floors

After all of that post-season cleaning, your floors will need a good vacuuming. And if you are going to vacuum, you may as well mop. 

Windows

Close and lock all windows, and check for any damaged screens or weather stripping. 

Don’t Retract your Slides or Pop-Outs Yet!

In the next post we will go over Preparing Your RV’s Exterior for Safe Winter Storage. 

Items you may be interested in while preparing your RV's Interior for Winter Storage

As an Amazon Associate, I earn from qualifying purchases.