

First and foremost, dump the RV waste tank.
 Please ensure to follow all local and state laws in regards to dumping your RV’s waste tanks. For Example, you might be wondering if it is legal to empty your RV black water tank into your house septic tank. The short answer is yes, but it comes with a hefty slew of if’s and’s, and but’s. Should you? Not without doing research first.
If you are having trouble finding the appropriate dump site facilities we have compiled a list of RV Dump Stations in El Dorado County
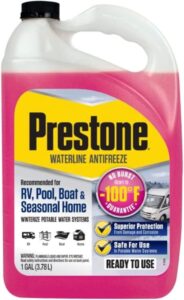
Pro Tip: RVs typically use 2-3 gallons of antifreeze, you can dump your RV antifreeze into a clean 5-gallon bucket to prevent the mess of moving the siphon hose between individual gallon bottles of antifreeze. To help the gravity feed of the siphon place the bucket on a flat surface about 2 feet above ground level.
- Open the siphon valve at the water pump. Insert the clear siphon tubing into a jug (or the 5-gallon bucket mentioned in our pro tip) of antifreeze. If you cannot find clear tubing near the water pump look for a hose that is roughly 2-3 feet long with a cap on the end of it.
- Be sure that the water tank shut-off valve is OFF. You do not want antifreeze to enter your fresh water tank.
- Turn ON the water pump. This will allow the antifreeze to be pulled into the water lines.
- Open the hot water faucets inside your RV: Kitchen, bathroom sink, bathroom shower, outside shower. Do this until you can see antifreeze flowing continuously. -NOTE: IF your RV has a dishwasher or washing machine (for clothes) you may want to check each appliance’s winterization instructions as you can most likely winterize them at the same time as the rest of your plumbing. Just be sure to wipe the insides down to prevent residue and staining.
- Close the hot water faucets and outside shower faucets. Then repeat the process, this time opening the cold water faucets inside of your RV, including the outdoor shower.
- Flush the toilet until you see antifreeze in the bowl- this could take several flushes.
Once you are done adding RV antifreeze:
- Turn the water pump off
- Turn the siphon valve off, and remove the hose from the container of antifreeze.
- Leave the water tank shut-off valve in the closed position to prevent antifreeze from entering the fresh water tank.
- Treat all P traps and drains with RV antifreeze. Each drain and/or P trap takes approximately 1 cup of antifreeze to be sufficiently protected.
- Immediately clean any spills or droplets of antifreeze to prevent staining or discoloration. If you are worried that your faucets will drip you can place paper towels under each faucet to prevent staining from occurring. The same can be done a shower head with a wand attachment, we recommend leaving the shower head wand in the shower pan, instead of hanging on the wall.
Congratulations! You have now successfully winterized your RV’s Plumbing System!
Up Next: Preparing Your RV’s Interior and Exterior for Safe Winter Storage.